Are you looking to remove Footer Credit in Blogger (blogspot) blog? Follow this step-by-step guide to learn how to do it.
What is a Footer Credit?
In the context of Blogger and other blogging platforms, a “footer credit” is a specific reference or acknowledgment placed at the bottom of a blog template. This credit typically mentions the designer or developer of the template and may also include links back to their website. It’s common for free blog templates to have such credits as a form of attribution and as a way for the template designer to gain recognition and potentially drive traffic to their site.

For example, a footer credit might read something like: “Theme designed by XYZ Designs.” or “Powered by Blogger. Template by ABC Templates.”
Step by Step Guide To Remove Footer Credits
Method: By Unlocking the Attribution Widget in Blogger
The Attribution widget in Blogger is typically locked by default, which means you cannot directly remove it from the Layout section of Blogger. Unlocking this widget will allow you to easily delete or modify the footer credit.
Here’s how you can do it:
1. Backup Your Blog:
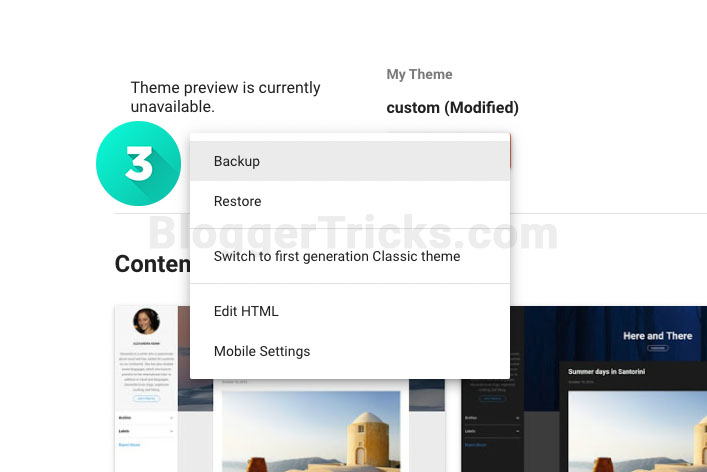
Always start by backing up your current template to prevent any irreversible changes.
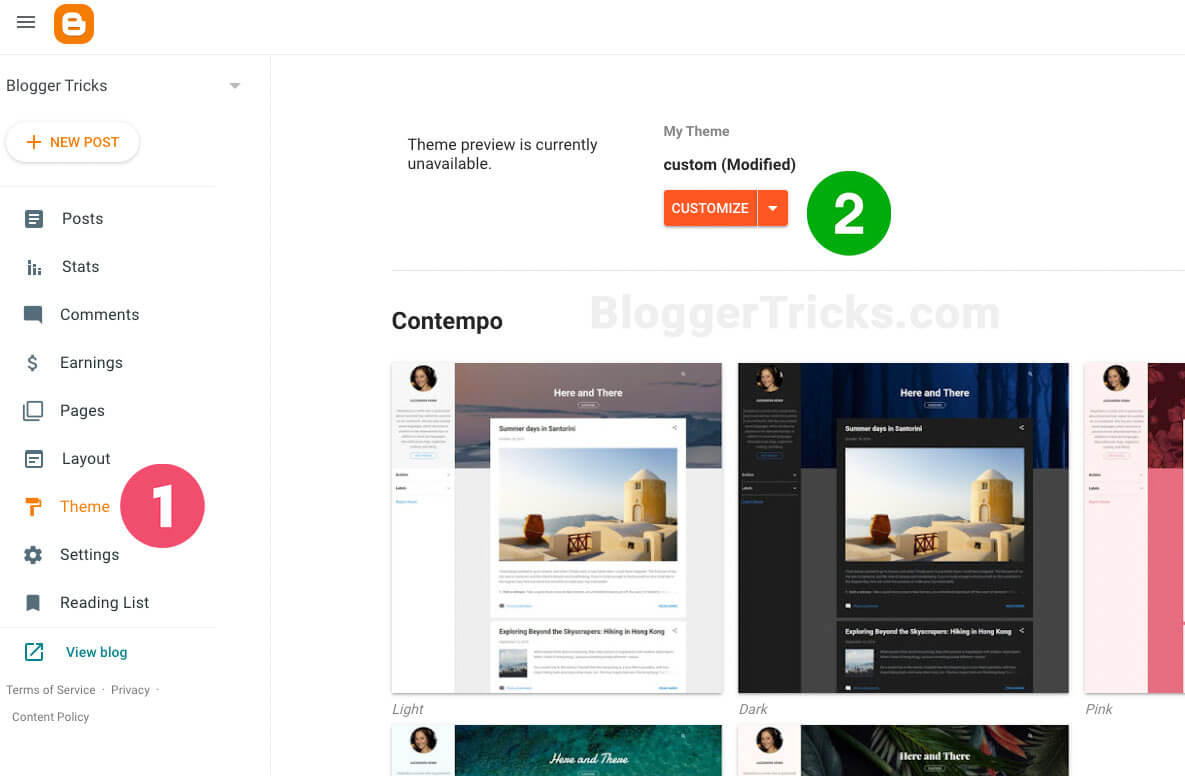
- Go to your Blogger Dashboard.
- Navigate to
Theme>Backup/Restore(usually on the top right corner). - Click on
Download Themeto save a copy of your current template.
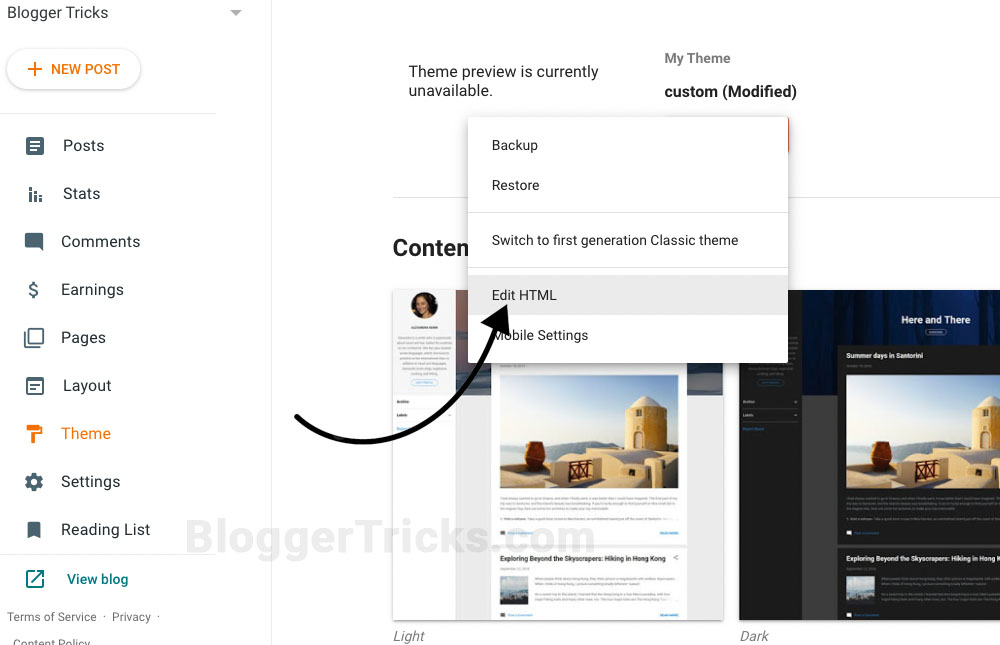
2. Access HTML Editor:
- From the Blogger dashboard, click on
Theme. - Beside the theme name, click the dropdown and select
Edit HTML.
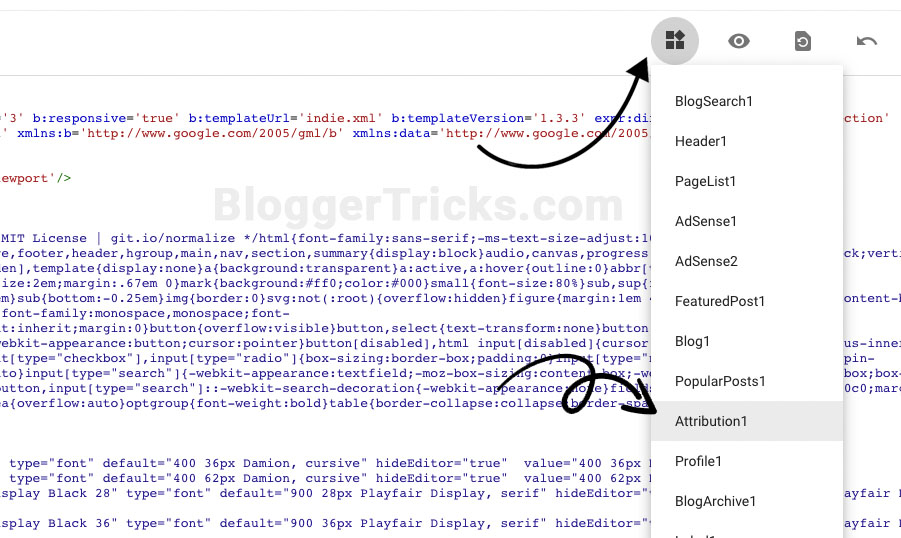
3. Locate the Attribution Widget Code:
Inside the HTML editor, use the “Jump to widget” dropdown located above the code area. Select Attribution1 from the list. This action will directly bring you to the relevant section in the template.
You’ll find a piece of code that looks like this:
<b:widget id='Attribution1' locked='true' title='' type='Attribution' visible='true'>4. Unlock the Widget:
Change locked='true' to locked='false'.
The code should now look like:
<b:widget id='Attribution1' locked='false' title='' type='Attribution' visible='true'>5. Save the Changes:
Click the “Save” button to save the changes you’ve made to the template.
6. Remove or Modify the Attribution Widget:
Once you’ve saved your changes, go back to the main Blogger dashboard.
Navigate to Layout.
You’ll now see the Attribution widget at the bottom. Since it’s unlocked, you’ll have the option to “Edit” or “Remove” it.
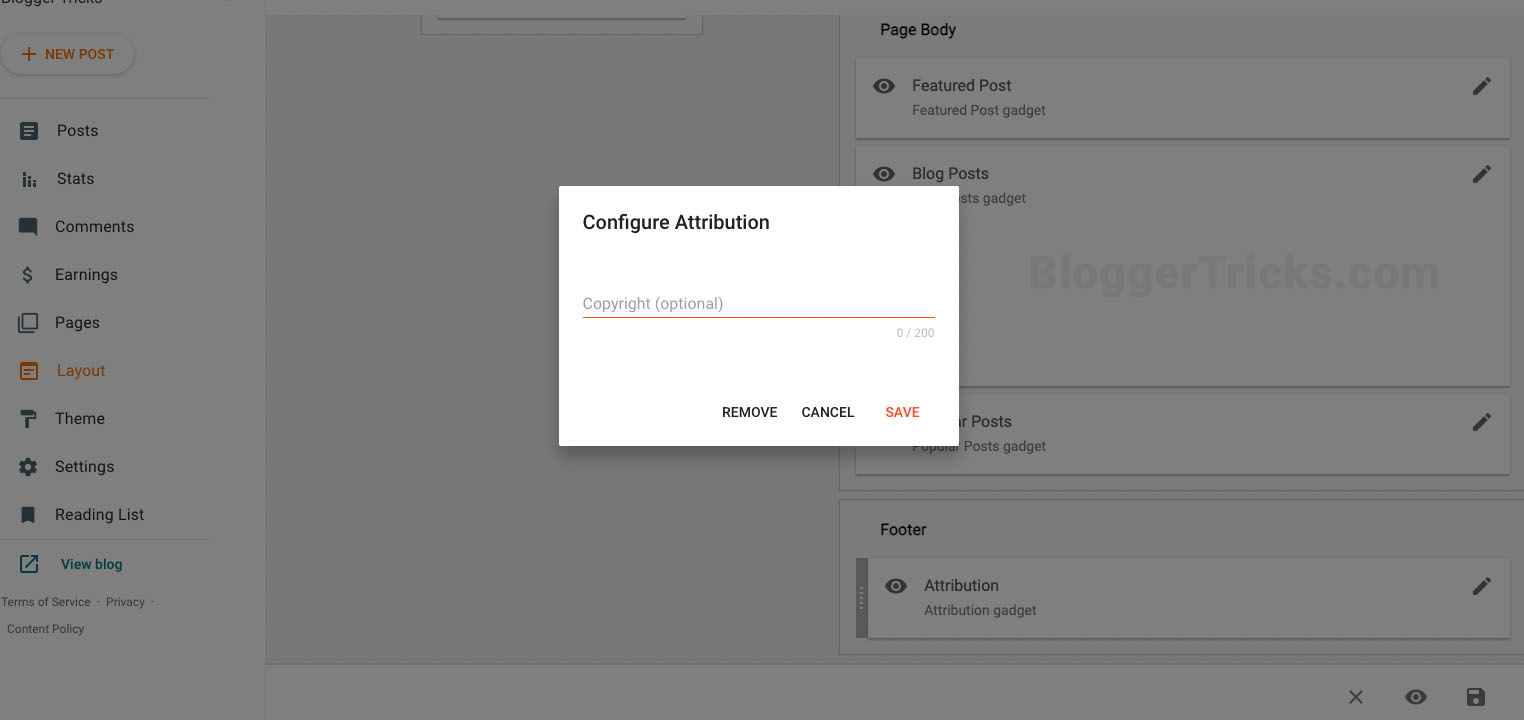
Click on “Edit” and you’ll have the option to change the content of the footer credit or remove it altogether by deleting the content.
If you wish to remove the entire widget, click on the remove/delete option.
7. Save Layout Changes:
After editing or removing the widget, always remember to save the changes made in the Layout section.
Need Help?
If you’re having trouble with this process or if you’re using a custom template and can’t remove the footer credit, let me know. Just drop a comment below with your website link, and I’ll try to help you out.